

Purple Fabric Flower Corsage
Here is a quick project you can do with just a small amount of scraps.You may recognize the purple from the bargello jacket completed on the last post. I had the purple flower pinned on the jacket without the leaves. It seemed to be lacking something so I added leaves.

Tools and Supplies
The flower is made from a strip of fabric folded length-wise pressed and gathered along the raw edge. The dark line on the purple fabric is where I surged the edge. Sew a basting stitch along the bottom (raw edge), draw up the basting stitch to gather the flower. The photo below looks slightly gathered because I unrolled it to finish the corsage.
 |
| Strip for Flower |
This strip for the flower is about 3 inches wide and 21 inches long, both ends are tapered at the last two inches. The photo below, shows the gathering threads pulled up. Sorry it is blurred, but I think you can see the gathering threads on the left side. The strip of fabric can be longer or shorter, depending on the thickness and texture of the fabric. The tightness of the gathers will depend on what kind of flower you want to make. Experiment until you get the result you want. No two flowers are exactly alike and the less "perfect" it is the more you will probably like it.
 |
| Gathered Strip for Flower |
 |
| Tracing Leaf Pattern |
To sew the leaves, place right sides together, matching the points. Sew down to the point from the back of the leaf, lift the foot with the needle down to pivot. Pivot, lower the foot and sew back up the other side to the back end of the leaf. Be sure to keep the very back of the leaf unstitched. I made my seam about an 8th of an inch from the edge. Trim the tip of the leaf so that you can get a clean point when you turn it right side out. Turn it right side out through the opening at the backside of the leaf. Press.
Now you can sew your leaves to the flower. Place the leaves on the sides of the flower in a way that is pleasing to you. Hold them in place with a pin until you get the leaves tacked onto the flower. Once the leaves are attached, you can add a broach pin fastener (available at craft stores). This can be sewed on or glued, I have better luck sewing. If you prefer not to add the broach pin fastener you can wear your new fabric corsage by pinning it like a normal corsage.
 |
| One completed leaf, one leaf turned and pressed with the smaller template lying on it. |
Once the leaves have been pressed, gather down the center from the back of the leaf using only one line of stitches. To do this, stitch on the side you chose to be the top side. Starting from the center back of the leaf, tack your starting point by stitching forward and backward about three stitches. Set the stitch length to about an eight of an inch. On my machine this is about a 4 setting. Stitch to the point of the leaf. Pull the bobbin stitch to gather the leaf, pull the top stitch to the back and knot the threads to keep the gathers secure. Once the leaf has been gathered it will give the leaf a natural curve, simulating an actual leaf. At this point I made a zig-zag stitch across the back of the leaf to finish the raw edge.
Now you can sew your leaves to the flower. Place the leaves on the sides of the flower in a way that is pleasing to you. Hold them in place with a pin until you get the leaves tacked onto the flower. Once the leaves are attached, you can add a broach pin fastener (available at craft stores). This can be sewed on or glued, I have better luck sewing. If you prefer not to add the broach pin fastener you can wear your new fabric corsage by pinning it like a normal corsage.
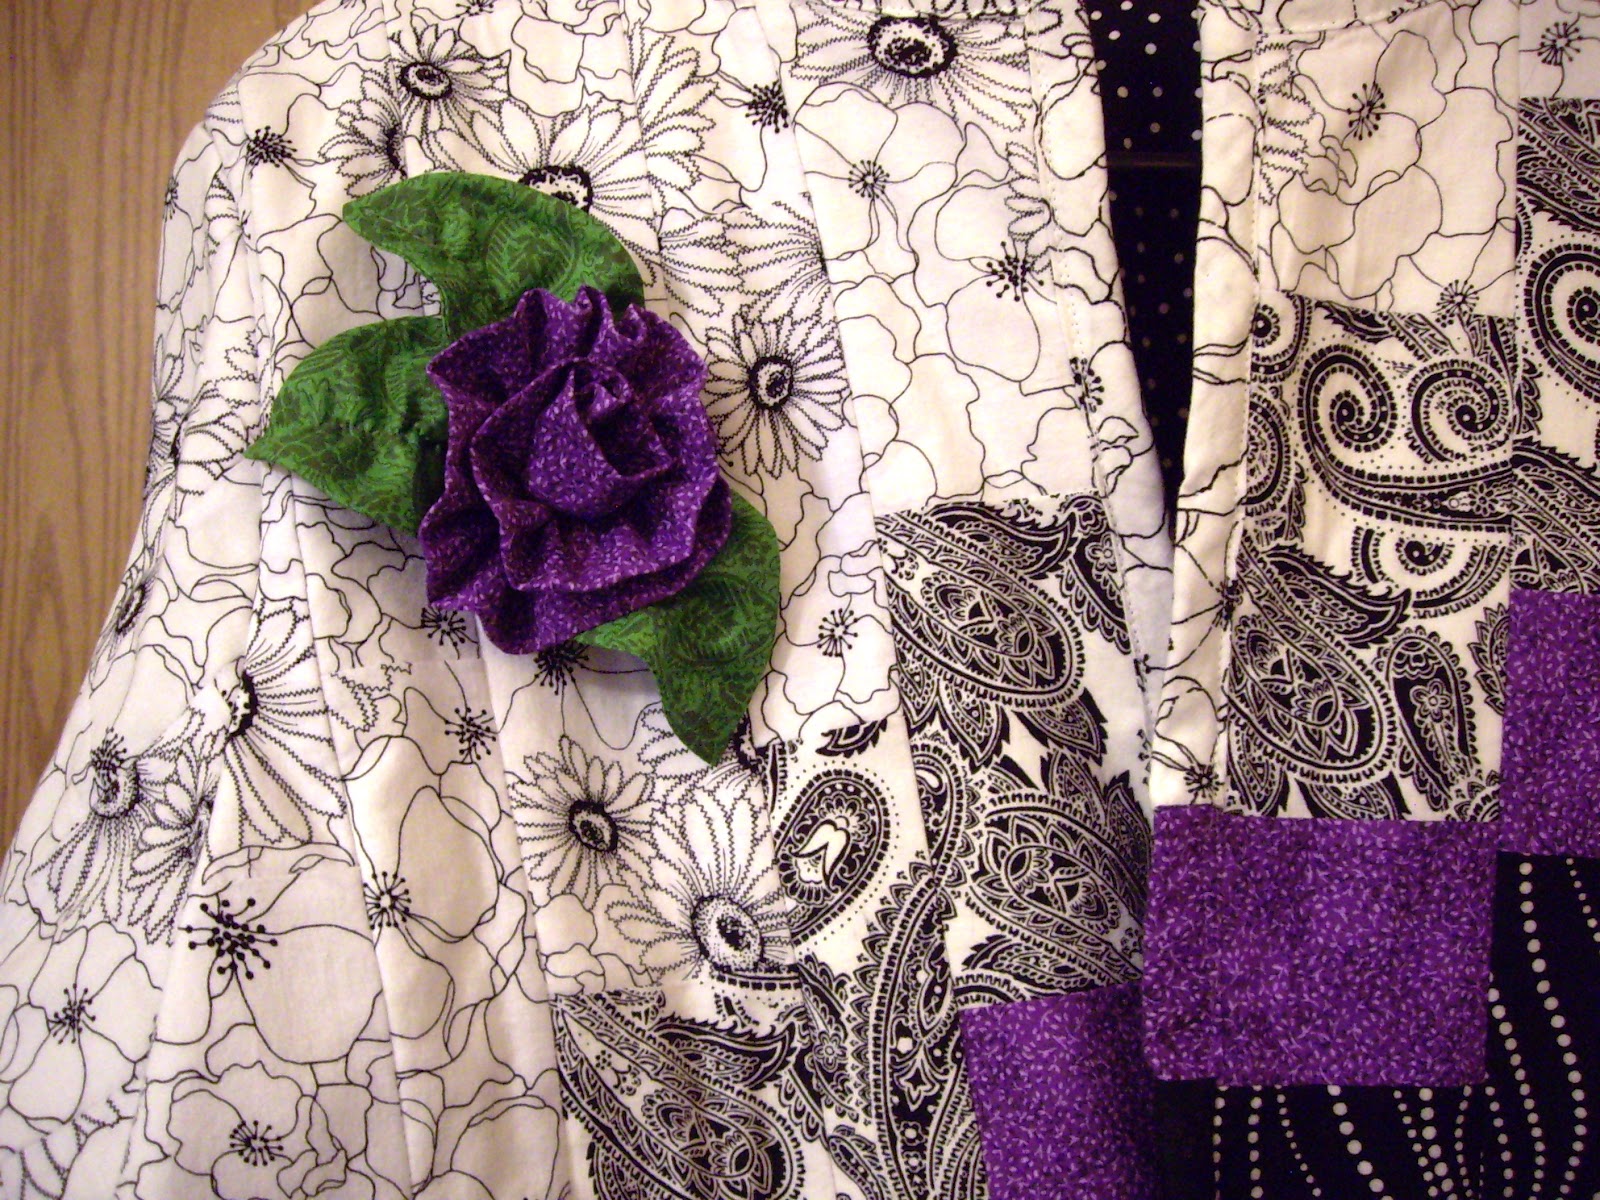 |
| Completed Fabric Corsage on Jacket |
No comments:
Post a Comment
Thanks for stopping by.