12.24.2014

Happy Holidays

Christmas Eve, 2014

Baking at sun up, it just seems right. 

I was sick last week (flu) so no time to bake, but today at sunup I started baking some of my favorites. There will not be as many choices, but my favorites, pumpkin bars, and soft ginger cookies will be here.  Plus a little candy cane ice cream, a slow cooked roast with all the vegetables, plus my kiddos will all be here for dinner.  

Just waiting for the butter to soften so I can start the cookies next.  It is a favorite recipe from Two Peas and Their Pod, you can find it here:  Click Here.

11.29.2014

Thanksgiving Break Sewing

If I don't sew over Thanksgiving then it seems like somehow I must have wasted my time. But here it is Saturday of a Thursday thru Sunday prized four day weekend and I am just now starting to sew. In fact, this is the first time I have sewn anything since the move. I can't say the sewing area is aligned as neatly as I would like, but everything is within reach. 

Vogue V1412,  a Rebecca Taylor tunic style blouse  

I just happened to be in the local fabric store when there was a sale on Vogue patterns last week. I need to update my wardrobe with beautiful blouses at this time and I needed something that would be quick, and forgive figure flaws. Rebecca Taylor's tunic blouse has several features that looked like it would make this happen. Vogue is very good about providing a lot of help on the outside of the pattern that can make these choices easier.

Picking the pattern

First is the photo image. Many patterns are illustrated with the designer's drawing. What is intended and what is really patterned do not always match the illustration so I look for a photographic image of the finished garment. It is common for the drawing to elongate and thin the figure so it looks very flattering. In real life wide hips, narrow shoulders, short torso and little or no waist will not look the same with the necessary alterations. 

This image looks flattering. It is long, made of a light weight fabric that has nice flow and drape. It does not have a defined waist and also has gathers in places that will make some alterations easier. This pattern has gathers across the front shoulders and at the back neck. This can add a little fullness through the hip and waist while staying smaller at the shoulder, slightly more gathers will make the shoulders a little more narrow and still allow for plenty of fullness at the bust with very minimal alterations. 


Clues on the pattern envelope

Size

One of the first things you need to know is the size the pattern comes in and how close the standard pattern measurements match your figure measurements. Sizes and measurements are usually listed on the top flap of the pattern. If you are lucky your measurements will be very close to the sizes listed in only one column. If they are not, I would say you are normal. Measurements for standard sizes are the "ideal" more often than the norm. It is common for personal measurements to fit into two columns and some of us pick from three columns. Some pattern companies include all sizes in one envelope and other companies will have small through 14 or 16 in one envelope and 14 or 16 through about 22-24 in another envelope. Unless you are dealing with sizes that are included in both envelopes, say a 14 bust and a 16 hip then it is a pretty good arrangement. Shoulder and bust adjustments are usually harder to make than the hip/waist adjustments so I purchase for the shoulder and bust measurements and plan to alter the hip waist if needed when making blouses and dresses. When making pants I usually purchase for the waist and alter the hip, but that plan may not work with all figure types. 


Difficulty level

Vogue labels their patterns by difficulty. Something with a lot of fitting like a jacket or designer wedding dress may be labeled expert while something with simple style lines and only a few seams may be labeled very easy, or easy. They also have average and difficult. This will let you know if there will be lots of pieces, seams, very accurate fitting or special skills needed. Some of Vogue's very easy patterns are also very stylish. So don't pick up the expert levels if you are a novice, but if you are stretching your skill level a bit Vogue has great instructions and illustrations. Just take your time and follow step by step. The pattern I have picked is average but I think that is because of the gathers in the back neck line, front shoulders and the odd neck features plus the fact that they have provided a full front pattern piece instead of the usual half piece that would normally be cut on the fold. On the muslin I am making I traced it and will be cutting it on the fold. When I make the fashion cut I may use the full extended front pattern if I need to match the fabric carefully. I am making a muslin version as I plan to alter the height between bust and shoulder, alter the back neck just a touch and change the hip size. 

Fabric and Notions

The back of the pattern will also tell you suggested fabrics to use, how much fabric for the size you plan to make, information about notions you will need, buttons, zippers and trims, interfacing and the finished length of the garment. If you plan to make it larger you may need to add a bit of extra fabric, likewise if you are planning to make it shorter you may not need quite as much fabric.  

One last hint about right pattern choice

Vogue has a little guide that lets you know if the pattern you are choosing will look good on your figure type. It is the little series of silhouettes in the four boxes on the back of the pattern, the inverted triangle, regular triangle, rectangle and hour glass. This is their representation of the figure types the pattern was designed to fit. Earlier I said if your figure measurements are in two or more columns it was normal, well this is how Vogue lets you know if this pattern will be flattering on your figure type. If your largest measurements are your bust and shoulders and your hips are the smallest then the inverted triangle is the symbol you will want to see on patterns you pick. If your bust measurement is smaller than your waist and hip then you want the standard triangle to be on your envelope. The rectangle is for those who have a hip and bust measurement that are fairly close but also do not have a smaller waist and the hourglass, well, that is the desired figure that most patterns are designed to fit. If you pick up a pattern and your silhouette shape is not on the envelope that is a clue that even with alterations you may not be able to get the desired results; look for another pattern. Rebecca Taylor's design should look good on all figure types. 

10.19.2014

Making Progress

Moving Chaos Progress
Sewing tools starting to emerge from the deluge of moving clutter
I was beginning to feel like I might never have a sewing space back, but today I can see the serger box, the sewing machine case, my mini roto-bin for the keep at hand sewing tools, the sewing task light and a few other sewing related items.  

It is not nearly set up to sew yet, but I am making progress. Many of the sewing tools are now in the right room! I am looking forward to everything being in its place and handy for use!

Now if I could find some of the other things that have not yet surfaced. 

10.04.2014

Moved but not settled

Boxes stacked in living room
Everything is in the new place but it not fully settled. Instead of shoulder high boxes stacked all around it is more like knee deep in some rooms and waist deep in others. As clothing goes into closets and dresser drawers and patterns are put back into the filing cabinet I can see progress.  

The first day I started unpacking boxes and stowing things in their rightful places it seemed to be going smoothly, then my son woke up and started moving more boxes on top of the stacks I was working on to get them out of his way. The stacks that had been decreasing started to remain steady. That was not encouraging. 

Now there are a lot of empty boxes folded flat and paper wrap from the dishes, china, glasses, vases and other breakable items. Moving is definitely a process. There are still more things than space available, but as I move things, consolidate and sort there are a few things that will go to the donate stack so eventually it will all be in it's proper space. I am looking forward to that so I can sew. But first I will be happy to have the computer in its more permanent location and my room re-arranged. As it turns out I set the bed up right by the cable connections so, internet and telephone are creating too many wires around my bed.  Back to sewing soon. 

9.21.2014

Closing and Moving

Moving image from www.oxfordremoval.com


At last, close and moving week has arrived. Tomorrow morning it is finally time to close on the new place then shortly after that time to move in. But first, cleaning, packing, selling, giving away things that I no longer need and do not want to move. 

I walked through the new place last Friday evening. The seller is mostly packed up and has just a handful of boxes. I wonder if he has a lot of stuff in storage or maybe he has already culled the things he does not want to keep. I am pretty sure that my boxes will be stacked floor to ceiling and will be quite a collection of things I may have to continue to cull. The place looked pretty small when I was there Friday. It measures just a little larger than where I live now and I think I may have to reduce all the things I own by about half again. 

Maybe once I settle in things will fit nicely after all. Now back to tossing out, selling, giving away and condensing all of these possessions. I've got to be ruthless.


8.30.2014

Counter height work space


I love my counter high work table, but I just don't have space to keep it.  
I have to sell it.

Still House Hunting

It's beautiful, will it pass inspection?
image from dohardmoney.com

I wish it was more fun to look for a place, 
but really it feels like some kind of race.

The best ones go fast but the bad ones do too
What do the folks on a tight budget do?

Rent's getting higher my lease at the end;
Do I risk month to month or renew it again?

The market is crazy with rent through the sky
I really have one choice and that is to buy.

This is the best place you've shown us to date
lets put in an offer before its to late.


Knitting Season Soon

A new place in the new season
(my August Posts are out of order. I have found a place.)

Dot and Socks, Berroco Self Striping Sox Yarn.  It is almost Knitting Season.

I found a new place and we are under contract. Close date set for late in September and now all the fun part. Inspection, corrections, appraisal; then packing, close and move, if all goes well. I hope we are able to be in and settled before the first snow flies. As in, I hope we have one of those beautiful sunny colorful autumn seasons where the weather is pleasant and the leaves stay on the trees for days on end. I want to move before the leaves even change color and way before they fall and reveal trees that look like Halloween props against a cold and gray sky. It will be in September. Snow in September is a possibility in Colorado and it is already much cooler in the mornings. It won't be long before it is crisp in the mornings, the sun is already slow to rise. 

As always, buying real estate is an adventure. You never know what you will find and what will be available when you look. In the late 80s it took us a whole summer to find a place. We made offers on three or four places only to have the seller select someone else even when the offers arrived at the same time and were equal in all ways. I had to tell myself each time that there must be something better out there for me.  

In some parts of America right now, real estate prices are low and interest rates are low. In the Denver metro area there is not a lot of inventory to chose from in the price range I wanted. The nice places are snapped up pretty fast and the not so nice ones don't stay on the market long either. Some that cost more than the one I am buying were not as nice and would have required a major rehab to work out. You learn not to hesitate when there is a good possibility.

The first place I put an offer on this time was an adorable townhouse with a large common area behind it. My offer went in within hours of looking at it, in fact it was the first offer, but the seller refused to review offers during the weekend so a couple of other offers were right behind mine. I offered above what they asked, planned to pay the closing costs and had already been through underwriting in the loan approval process. It was the nicest of the places we looked at that day and only one of two that I even considered for an offer. It had a few things I was not thrilled about, not quite as much dining table space as I really needed and only one bathroom and the tub had one of those nasty plastic liners instead of the porcelain coated cast iron. (Not nasty as in needed to be cleaned, it was brand new, but nasty as in would not be easy to maintain.)

Like before I just had to know that something better was out there when I did not succeed on an offer. The one I am getting has a real porcelain over cast iron tub that will be easy to scrub when needed, and two bathrooms. Ah Yes. There is always something better out there. This one will cut 100 miles per week off of my commute to work. It is also peaceful and quiet with a wonderful southern exposure and beautiful view. Yes, an even better view than the first one.

As you can imagine, I will be busy for a while. Follow my Pinterest boards if you like. I pin things about knitting, sewing and cooking and other things too.


8.12.2014

House Hunting


Home Sweet Home? Photo from
http://www.panoramio.com/photo/10975416
I have been busy looking for a new place to live so we may be able to move out of this little over-priced noisy uncomfortable rented apartment soon. I am sure the right place is out there and I want to find it fast, but it may need the miracle of being in the right place at the right time. 

Mountain Shack - Photo from
http://hqwide.com/mountains-landscapes-nature-shack-wallpaper-71747
/
The nice ones are gone before you know they were available and the others are even smaller than this little apartment. Some hang around a while. Those are the ones that need some kind of overhaul, way more work and investment than a good deep clean and paint or carpet; very expensive things like structural reform, roofs, windows, new driveways and landscape updates. Others are protected by the previous owner's taste in paint color. Why are the extremely dark maroon reds, purples or turquoise accent walls so prevalent? These colors are so dark or vicious that it will have to be some kind of special undercoat and paint to cover it up and I am not up to hanging drywall.  

Then there are the ones that look amazing, have a great price, all the appliances, reasonable paint colors but are 3 or 4 hours out of the area. There are even larger than expected perfect places that are in other states. How do those get on the list when you draw the map to include the area you where you want to live? 

Anyway, while I am busy not sewing and looking for a new place to house the sewing hobby you can follow me on Pinterest. Some boards relate to sewing but there are others there for knitting, quilting, yards and gardens, recipes, houses, storage ideas, landscapes and more.  

7.27.2014

Cooking again instead of sewing

I said earlier this year I would test my favorite recipes and organize a cook book.  Cook Book Resolution

I have to admit that cooking is probably my least favorite activity. I like to bake and I use a convection, inferred cooking appliance when I can because I love the kind of cooking where I do the prep work, then let the oven, slow cooker or other appliance do the cooking. If I have to stand over it, watch it, tend to it or otherwise be continuously involved with the process then I'd rather make a reservation. 


Ripe bananas
Today was the day I had to test the banana pudding recipe. It was not my plan on a hot day to have to stand in the kitchen constantly stirring the pudding mixture. When I went shopping about three days ago I purchased more bananas than we could use before they became too ripe. In another day I would have been testing the banana bread recipe instead of the banana pudding recipe. 


Very ripe Bananas

My recipe is one I got from my Grandmother. She gave me the list of ingredients and told me all of the details of how to make it. I only made minimal notations about how to prepare the recipe. This is exactly the kind of thing I needed to find and correct. My kiddos will be at a loss for how to make the banana pudding unless it is corrected with full instructions, but with the recipe neatly typed, I will not recognize it. 


Over ripe, but acceptable banana
Here is the recipe with the instructions. There is no comparison to instant pudding mixes. 


Mema's Banana Pudding

2 or 3 large bananas (more if smaller, use enough to cover the surface of your serving dish for two layers)
1 box of vanilla wafers - your favorite brand, or make them ahead of time 
3/4 cup sugar
1/3 cup flour
1/4 teaspoon salt
2 cups milk
3 egg yolks, reserve the egg whites if you want to top with meringue
2 tablespoons butter
1 teaspoon vanilla (I like vanilla so I always use real vanilla and double whatever the recipe lists, so just know that I used at least 2 teaspoons.)

Before you begin to cook, separate the eggs, stir the egg yolks and set aside in about a two cup bowl.

In a sauce pay, mix the sugar, flour and salt, gradually stir in the milk and heat over a medium temp stirring constantly until the mixture thickens and boils. I use a  cone shaped wire whisk. It covers more of the pan surface eliminating any chance of letting the mixture burn or become lumpy. 

While stirring constantly allow mixture to boil for two minutes. Remove from heat.  

With a large spoon dip a little of the pudding mixture into the eggs, stir the eggs to prevent them from cooking. Continue to add a little of the hot mixture to the eggs, slowly raising the temperature of the eggs without cooking them. When the eggs are sufficiently hot, add the egg mixture to the rest of the hot pudding mixture. Stir.

Return the pudding with eggs added back to the burner, bring to a boil and cook for two more minutes, stirring constantly.

Once cooked, remove from heat, add the teaspoon of vanilla and two tablespoons of butter, stir, set aside long enough to cover the bottom of your serving dish with vanilla wafers and a layer of sliced bananas. Pour half of the pudding over the bananas and wafers. Place another layer of vanilla wafers over the pudding and another layer of sliced bananas. Pour the rest of the pudding over the second layer of vanilla wafers and sliced bananas. 

Let the vanilla pudding sit while you whip up the meringue or allow pudding to cool and add a whipped cream topping. Store in the refrigerator, best served cold and is even better the second day. 

7.17.2014

Summer Travel

Quick trip across mid America flat land. 

Kansas Windmills at Work
Yes, I am talking about Kansas. I got some inspiration for a new quilt while traveling through the wind farms between Russell and Hays. There was one place along the way where cattle were cooling themselves in a field near an old fashioned rusty windmill. Beyond the cattle on a higher hill one of the large white windmills towered over the scene. Even further away and on even higher ground there were more large windmills clustered near the ridge of the hill. They looked smaller because they were so far away. Each layer of land was a a different color, green in the field, yellow ocher near the tall windmill and yellow-gold at the next hill. There was not any real place to pull over to get a photograph so I took mental notes about how the windmill shadows fell on the tower, what the clouds looked like and how interesting it was to see the different generations of windmills side by side. 

A little bit later I pulled off at an exit to take a picture of one of the windmills up close.  From the highway they seem to tower silently in groups. When you stand near them there is a whooooosh sound as the large blades slice through the air. On one side of the road there was one lonely windmill and on the other there were several much further away.  When you drive through at night they all have red lights that blink together to alert planes in the area of their presence. 

Kansas Wind Farms
When I got to Colby I stopped at Quilt Cabin. They have their fabrics grouped in color themes. There is a whole section for the Wizard of Oz with poppies, windmills, and other prints that could be used together. They had many patterns, specialty rulers, sewing machines, layer cakes, jelly rolls, honey buns, and charm packs. The color themes have names like Harvest, which is the brown, yellow, gold and orange colors or grasses, which is an assortment of greens. There are also themes for sky, clouds, water. I looked for their web site which I could not find but they do have a facebook page. 

6.22.2014

Hiraeth


I found this posted to facebook. What a neat word. It was a fitting follow up to a post my daughter recently added where she shared photos of her childhood home. She said she felt sad when she looked at a group of pictures in a photo album that had pictures of the house and yard.

I felt the same way at the end of my marriage when I realized that I was not grieving what I had lost, so much as what I had never had in the relationship. I feel it more though about the home we had to sell. The back yard was much larger than you would expect to find from the front and was surrounded with large evergreen trees, apple trees, lilac bushes and red sumac.  In the side front there was an overgrown hedge fence that provided a cool afternoon shade. A large cottonwood tree graced the backyard with shade in the afternoon and it felt like a private sanctuary.

There were poppies that bloomed bright orange for a couple of weeks in the spring. The breezes made the flower heads bob and sway and they were a sight to behold. Occasionally I drive by to see what has become of the place. The current owners have cut out most of the trees, dug up the bushes and abolished the poppies. It has a properly manicured lawn now and lacks the personality it once had. Still, hiraeth perfectly describes how I feel about the time I spent there.


6.07.2014

Pinterest Blue Tape Pattern Test Sew

Review of the results for the Pinterest 3M Blue Painter's Tape pattern.


Pattern  pieces cut out
The sleeve of this shirt has a rolled up cuff so the only update to the pattern I needed to make was to include the cuff facing and hem.  You can see it above at the bottom of the sleeve pattern.  Also in this photo are the two front pieces on the left with two strips for the button and button hole bands on the left, the sleeve, collar and collar stand pieces in the center and the two back pieces on the right.

Construction steps for this shirt are listed below. I put sew the collar and collar stand at 7 and 8, but you could do this right after you interface these pieces, then they will be ready when you get the front and back sewn together at the shoulder. 

1. Interface the collar, collar stand, and button bands
2. Sew the button bands to the center front pieces
3. Sew the center fronts to the front side pieces, press then serge seams, top stitch seams down at this point if desired.
4. Sew the center back pieces to the back side pieces
5. Sew the center back pieces together, then press and serge seams, top stitch seams if desired
6. Sew front pieces to back at shoulders
7. Sew the collar, trim/grade seams, turn and press
8. Sew the collar stand to the collar, grade seams, turn and press
9. Sew the collar stand to the shirt, trim, grade seams, then hand stitch the inside of the collar stand by hand.
10. Sew the notch at the bottom of the sleeve,snip,  turn press to get smooth v-notch at the end of the sleeve
11. Sew the sleeves to the shirt, making sure the front of the sleeve and the back of the sleeve are positioned correctly on each side.
12. Sew the side seams matching seam placement under the arm and sewing from the bottom of the arm to the end of the sleeve, including the sleeve self facing, then again from the under arm to the bottom of the shirt on both sides. 
13. Roll up the sleeve facings, press again, fold in the hem and sew this hem around the sleeve.
14. Hem by rolling up the bottom of the shirt and pressing the raw edge inside this fold. About an inch or slightly less for this hem.
15. Mark and sew button holes on the right side of the shirt center front button band cut button holes open carefully.
16. Mark placement for buttons, sew on buttons.

Once I had the sleeves and collar on the shirt I tried it on to be sure it fit.  I ended up taking it up about 3/4 inch at the shoulder. But this was a minor adjustment for a good fit. 
Original Shirt
Test Sew, new shirt

I would call this method of copying a shirt a success. It works well for cotton and sturdy woven fabrics. The print on the fabric makes it hard to see the seams. Now I need to make a pretty one with the front tucks in a favorite color, maybe purple. Thank you Pinterest poster for this idea.  I don't think this one will be a "nailed it" failure. 


5.31.2014

Pinterest Test

Blue Painter's tape with on one section with design notes
I recently started visiting Pinterest. I have heard a lot about it, seen posts shared on facebook, and found myself laughing so hard I was crying especially when I looked at the "Nailed It" posts. In case you are not following any of these boards the nailed it posts are where someone tries something they have seen on Pinterest that looks like an amazing project. The newbie's results are usually abysmal at best but the caption is always "nailed it", like they too had succeeded.  

Because my interest are in do-it-yourself knitting/sewing projects I recently saw a post where they had used blue masking tape to tape out the exact shapes of ready made clothing to obtain a perfect knock-off copy. I did not share their idea that it would be a good thing to do because I really don't like "Sticky". I don't like stickers on my windshield even if it is a parking permit or inspection sticker. I detest bumper stickers. And I could not wash my kids hands often enough to keep them from being sticky when they were little. So I nearly let this little gem of a tip get past me. 

I have had success with tracing, and marking knock off patterns before, but it takes a lot of patience because if your don't pin the garment flat, it is easy to have the pattern slip, bunch, gap or just slide away so that accuracy is difficult. The blue tape works because it is not very tacky unless you leave it in place too long. It is also easy to tear into smaller strips to use around the curved seam edges. The garment I used fits perfectly and does not have any darts so if you are using this on something with darts you will have to make adjustments so that you allow the correct space for darts. 

Here is what happened while taping the pattern. Depending on my results with the test sew I may be able to honestly say Nailed-It. 

First I started with a shirt that fits perfectly and pressed it to get out all of the wrinkles. I decided that it would probably be easier to just trace the collar and collar stand and blue tape the body and sleeve. My shirt has princesses seams, a seam down the center back and three quarter length sleeves so I had five pieces to copy. I started with the left center front which I will show you here, start to finish. I could have just as easily used the right center front, but either way, you will only have to copy one half of your shirt because each piece is cut in pairs on folded fabric. 


Center front, marking the seam edges first
This shirt also has horizontal tucks across the front. I did not mark them because if I do put tucks in my shirt, I will sew the tucks first before I lay out the pattern. That will save time and keep the tucks evenly spaced. I did mark on the finished pattern where the yoke and tucks start/stop.  In the photo above you can see how I have torn the tape in smaller pieces to get an accurate mark at the curved seams. Where the seams are straight you can use longer pieces. Once you have taped exactly on the outer seams of the piece you are working on, use more tape to fill the space in the middle. I purchased two sizes of blue tape for this. I used tape that was slightly less than an inch wide on the outer edges and wider tape, about two inches, for the center fill. I thought this would give the pattern a little more structure and be easier to remove without separating and defeating the purpose. 


Center front filled, marked, and starting to lift from the fabric
This photograph shows the pattern piece fully filled in, and design marks added where the yoke meets the lower front that is tucked.  If I make tucks I will probably redraw the yoke and tucked section as two pieces, but I will not need that seam if I do not add the tucks. It would be helpful to mark the straight of grain line here too. After this piece I tried to lay the first center piece of tape down along the grain line so I had the straight of grain marked, but this was the very first section I taped and you do learn a few things as you go. When I get ready to cut this out I will probably compare my taped piece to the shirt again to make that mark. The shoulder section is just starting to curl off of the fabric in this picture.  


Removing the tape from the garment
Don't rush it when you remove the tape pattern. The smaller edge pieces will not all want to lift together and you may have to make gentle tugs from all edges to keep your pattern together. When one part would start to rebel I just moved to another side to loosen the tape's grip, working around until the whole pattern lifted neatly from the fabric.


Front center piece placed on tracing paper so I can add the cutting line
To keep the new pattern together I placed it on tracing paper. This just supports the piece and allows room to make the cut lines and keeps the sticky pattern from attaching to something else.


Back side of pattern on tracing paper
I turned the pattern over and used a burnishing tool to smooth the tape and remove wrinkles and air pockets.

Now do the same thing for every piece you need to copy. On this shirt I still had a front side, back side and center back to trace plus the sleeve. The sleeve was the hardest piece to tape because I could not lay it completely flat from seam to seam so I taped it in two pieces along the press line and marked on the blue tape where the shoulder seam touched the sleeve for future reference. I did not make a copy of the button band. I will just cut a piece double the measured width plus seam allowances on both sides, fold, press and sew onto the front just before I sew on the collar stand and collar. It is straight except for a slight curve near the neck and is not cut on the bias. This will not require a pattern but it is one more piece I need to cut. 

The test sew will probably not be a true muslin as I expect the results to be very accurate with little need for any alteration. It that turns out to be true I will have a tried and true shirt pattern. 


5.24.2014

Sewing Machine Maintenance

I had to open my machine this week to add oil, clean lint and do a little preventative maintenance. I managed to do something incorrectly though and ended up having to buy a replacement bobbin case. Luckily the part was in stock and not a special order. 

I think I forgot to fully tighten the face plate before I started sewing again, and the bobbin case popped out of place and got hit by the needle. I was very lucky that I did not cause more damage. They assured me at the sewing store that I was not the first one to ever do this and I would not be the last. So you don't have this same problem, I am sharing here what I learned.

bobbin case exposed, round screwdriver and metal face plate in place.
Dust and lint will collect under the needle and feed dogs.  I make sure to brush this area with a small brush, made for this purpose and vacuum it with a small "data" vac after about every three or four garments. If I sew something that sheds more lint then it may be necessary clean it more frequently. In the picture above, the bobbin case is still in place.  

Bobbin case has been removed
There are two small screws that hold the metal face plate in place. In this photo the face plate is in place and the bobbin case is removed. It is very important that the metal face plate is replaced and secured tightly before the bobbin case is replaced. When the bobbin case is replaced first, it is possible not to tighten the face plate properly which allows it to move. I don't think that I had the bobbin case in first, but for some reason, I think I did not have the face plate secured properly.  

Old and New Bobbin Cases
The bobbin case on the left is the new one, and the one on the right is the damaged one. They look the same, but when the old one got hit with the needle, it created a bur that will not allow the case to sit properly. I was fortunate I did not do more damage. 


5.18.2014

B5757 Design Changes

The last time I took a minute to sew I picked this skirt pattern, Butterick 5757.  The drawing 


looks cute, but even in the smallest sizes this skirt would have problems. The waistband casing is the same size as the full width of the skirt which of course is meant to be gathered. The extra fabric is non-cooperative and just bunches unevenly around the waist elastic.
I liked the fullness of the skirt because I picked a fabric that has an amazing drape and swing but to be able to wear this one, I had to make some design changes. 

Ripping out the waistband seams
I removed the waistband casing. It was too big, with the elastic in it it just bunched and did not maintain even gathers. The elastic also stretched out too much so that the waistband was too loose. I did not make it easier for myself as I had already serged the seam so it took some time and patience with the seam ripper.  

New pocket cut, and set beside left side seam so I knew how much to open the side seam for the pocket.
I needed a way to open the skirt for a regular waistband. The only seams were on the side. The original pattern design had inseam side pockets which I had omitted because I did not want any extra fullness around the waist or hip. After removing the waistband, I opened the left side seam enough to include an inseam side pocket. 

Thread tails on the inside pockets show serged area of pocket.
I needed to alter the pocket so that I could easily get into and out of the skirt. To do this I did not sew the inside seam of the pocket, so that the skirt would open wider at the waist to allow easier entry and exit. I attached the pocket to each side, serged about 6 inches down on inside pocket seam to finish the fabric and prevent fraying.

The red topped pins show the bottom of the pocket and where to start/stop sewing.

Then I stitched the bottom of the pocket together. the new pocket seam at the side seams, stitched the pocket seam to the inside of the pocket on each side and serged the bottom of the pocket. With all of these changes I can gather the fullness evenly and add a more fitted waistband to the skirt. Or, maybe something else. 

I have not yet decided if I will add a traditional waistband or if I will make this more like a dress. I am considering adding a flesh tone lightweight slip like bodice and sewing the skirt to that. With a little elastic at the waist to make it more comfortable, like a dress but with the fit and style of a skirt. I would be able to wear a top over it and not worry about the waistband rolling. Once I have made the bodice to fit, I can add the skirt.  It will have to open under the left arm so I have more design work ahead.  If I had not been thinking about doing this modification, I could have just added a zipper instead of a pocket at the side seam.

5.04.2014

Spring Inspiration

It has been a warm and almost sunny weekend here with temps in the high 70s on both days. I am pretty sure two warm weather days on the weekend have not happened here since last October.

Between cold windy days and warm spring days, filled with intense bouts of allergy induced sneezing, I have been in the mood for spring sewing.  


The colors in this recent fabric purchase just say spring. The fabric is a very easy care poly blend silky fabric with amazing drape. 

I thought the very dark navy and off-white floral print would make an easy carefree skirt like the Butterick B5757 pictured below. The pattern is easy to make but there is so much fabric in it that even with the waist gathered tight it does not look like the photo. It is a good thing that it has so much fabric. This is going to be a remake. Now I remember why I rarely use a commercial pattern any more.


Happy Spring, I have my work "cut out" here. 

4.27.2014

Small child's back pack


Once a long time ago, I made a back pack for my son and was sure I had a pattern around here somewhere. After looking through all of the patterns, I  realized that I no longer have the pattern so I drew up a new one. 


Here is the sketched pattern with all of the items I needed to make it. Fabric - 1 yard of double sided pre-quilted fabric, strap adjusters Measuring Tape, Tracing paper, 2 Zippers, Thread (not pictured), tracing paper and scissors. Also pictured, but not used was a package of extra wide, double fold bias tape. I thought I might finished the raw edges with it, but I serged the raw edges instead.


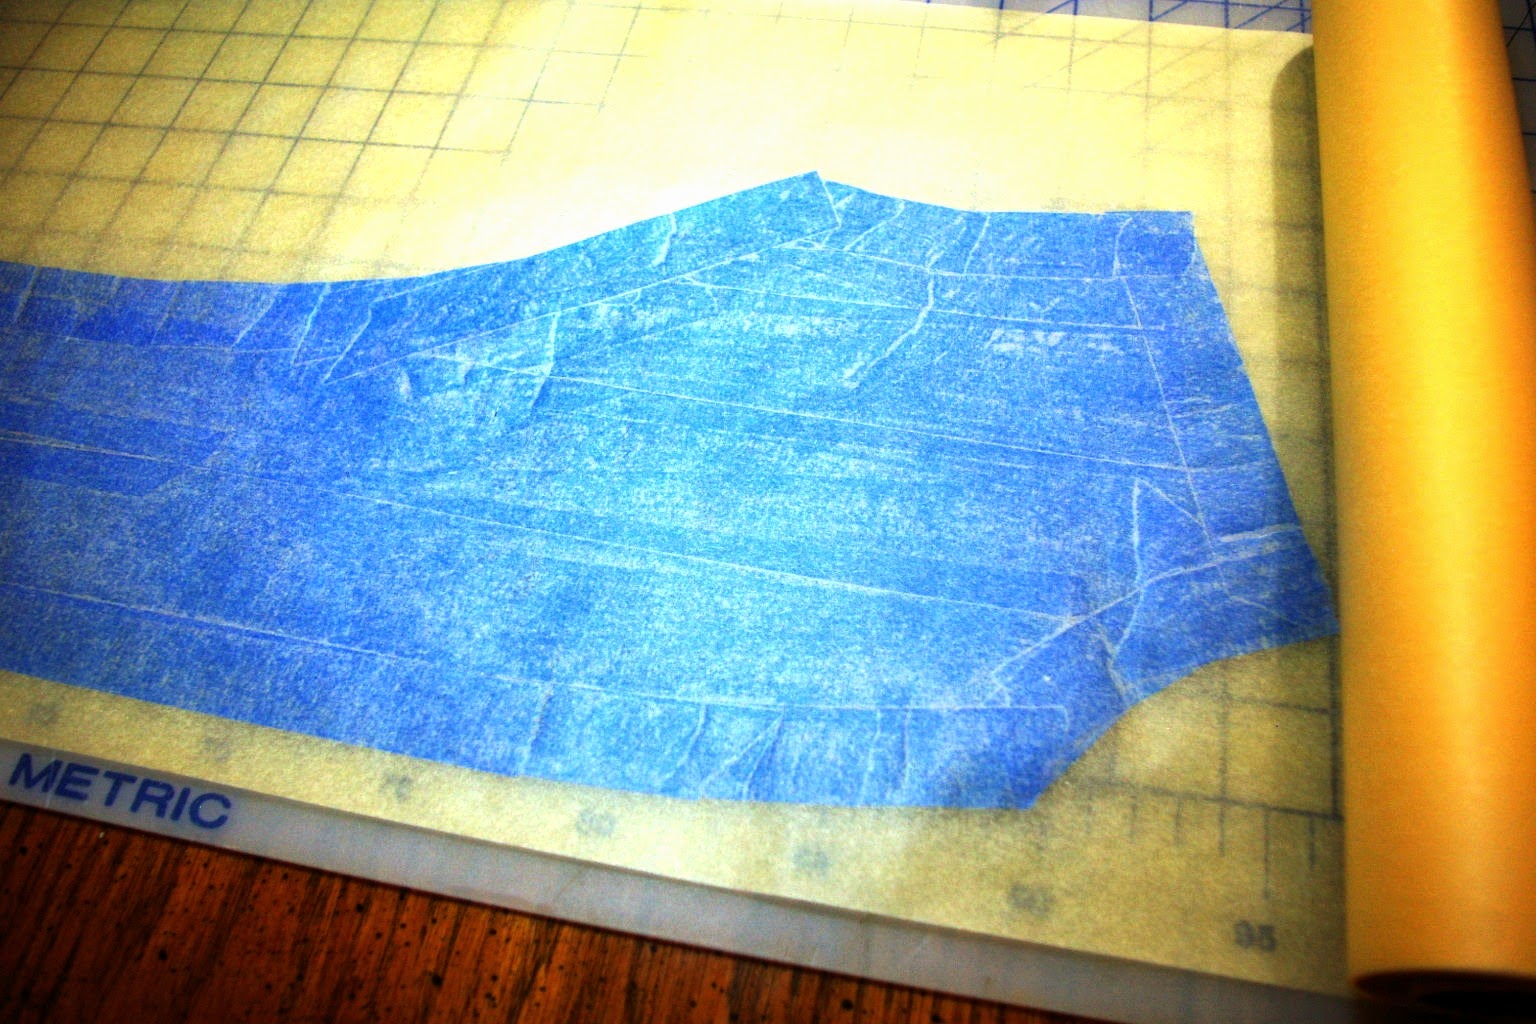
My original sketch, the green lines proved to be too small for the zippers I had purchased, so I redrew the planned backpack just a little larger, the black lines and added the seam allowance, dotted line. You can see the zipper resting around the intended seam area and the second smaller zipper near an additional pocket area.


There were several pieces to cut, but I only made an actual pattern for the front, which I also used for the back. I had made the indication of a second section with the green horizontal line about mid way up the original drawing. The fabric had stripped sections that I used for the shoulder straps, zipper sides, and side panels and zipper panels. I cut two sections for the zippers as shown above and the matching stripe for the bottom sections.   

Here is how you can make one too.

1.  Cut front and back panels from the pattern
2.  Cut front pocket from the bottom portion of the pattern
3.  Cut zipper side panels, 2 for the main section and 2 for the secondary pocket these need to be about 1 1/2 inches longer than your zippers for seam areas
4.  Cut the bottom panels, this is the part that joins to the zipper section and completes the bands around the backpack. you will need one for the front pocket and one for the main section. Cut it longer than you think you need, you can always trim away the excess, but you can't easily add extra if you cut it too short.
5.  Also cut two shoulder straps, make it double the width of the planned shoulder strap plus enough for a seam allowance on each side. It will need to be long enough to go over the child's shoulders and down the front of their chest, just slightly shorter than the length of the back pack. For this little backpack, the shoulder straps were about 11 inches long. 
6. I had also purchased two yards of grosgrain ribbon.  You need just a few inches to make a little loop on the back, then two longer pieces to place through the straps and use to adjust the fit of the straps. And two more smaller pieces of ribbon to attach the strap adjusters at the bottom of the back pack.  

Assembly

1.  Sew the zipper side sections to each side of the zippers, leaving about 3/4 inch on each end. 
2.  Once the zipper sections have been sewn, attach the bottom section to one side of each zipper section.  You will have two strips each with a zipper section and a bottom section.
3.  Sew the shorter zipper section to the front pocket section. Fold over the edges to complete the pocket side section, sew across below the zipper to secure and trim away any extra fabric that is longer than about a half inch seam allowance. 
4.  Serge finish the raw edges.  
5.  Open the zipper and sew the zipper pocket section to the front of the back pack.
6.  Sew the larger zipper section to the front of the back pack.  Serge the raw edges
7.  Sew the shoulder straps, turn shoulder straps right side out and feed ribbons though to the top.  Sew the shoulder strap, across the top edge, catching the ribbon.  Turn the bottom portion of the shoulder straps up, leaving the ribbon extended. Sew across the bottom of the shoulder strap so that the raw edges are inside and the ribbon extends beyond the straps. (for each strap). 
8.  Attach the straps to the right side of the backpack back and tack in place, fold the ribbons and pin the straps down so they will not be sewn except at the top of the back.  
9.  On the bottom of the back pack attach a 5 or 6 inch long ribbon to the front sides, tacking across the seam area and pinning out of the way so that it is not caught at any other spot.
10.  At the center top of the back pack fold a 5-6 inch ribbon so that it makes a small loop for hanging the back pack on a coat hanger type, tack in place and pin the loop out of the way.
11.  Open the main body zipper, and with the whole pack turned wrong side out, sew the front of the backpack to the back of the backpack. 
12.  Serge the raw edges
13.  Turn the backpack right side out.
14.  Unpin the straps and ribbons
15.  Attach the Strap adjuster pieces to the ribbons at the bottom of the back pack.
16.  Finish the bottom edges of the ribbon on the backpack straps and lace through the strap adjuster. 

4.11.2014

Ten more rows to go

Neckband on the needles only 10 more rows to go
Only ten more rows to go. Of course, these are the longest rows I have ever made in my whole life. The last rows are the neckband and self facing portion of the neckband. The neckband is the full length from one lower front edge, up and around the neck and back down to the opposite lower edge. Three hundred seventy three stitches in the original version. The pattern called for a 32" circular needle for this portion but I invested in a 47" long needle. It is slightly longer than needed, but not much. I think the 32" needle would have been pretty crowded.

When I started this I had altered the pattern a little so even in my version there are 365 stitches in this row. Before I started the neckband I wondered if I should use the larger of two balls of yarn or maybe the smaller ball of yarn that was left over from the body portions of this project. I did not want to run out of yarn and have to tie in a new start if there was not enough yarn in the smaller yarn ball. Now I am glad that I used the larger section and am wondering if it is even going to be enough or am I going to run out and end up joining the other section anyway.  

I thought I was nearly finished with this project when I got to the point of adding the neckband until I realized just how much more there was to knit with 32 rows and 365 stitches per row. I think this neckband has almost as many stitches as the back.  

It is a good thing it is nearly finished. I am running out of knitting weather. The forecast is for 70 degrees tomorrow, but cold with rain and maybe snow the day after that. Sounds like the perfect weather to finally finish this last winter knitting project.

This is Vickie Square's Sodenashi from Knit Komono. There are instructions for 18 designs with simple shapes, and beautiful stitches. There are several more designs I want to make in this book.